Showing posts with label house restoration. Show all posts

October 12, 2015

More Architectural Archaeology, Window Edition

After we moved in this spring, I was determined to put some flowers out to brighten up the landscaping, which for the most part consists of lots and lots of drab, overgrown evergreen shrubs. I got a couple of flats of impatiens because I didn't have time to get creative and there isn't a much more sure thing when you need bright, cheery, plant it and walk away for the rest of the summer. When I was planting up the little bed in front of the bay window, about where I have the mulch pushed back to in the photo, I struck concrete, going all the way across the bed. I wondered about it, but wasn't too inclined to investigate further at the time.
Early in the summer we had a couple of extremely heavy, sustained rains during which we found out just how not water tight our basement is. The ceramic block walls leak like a sieve and in places on the unfinished parts we witnessed water literally pouring in. The finished side has been waterproofed with a drain around the perimeter going to a sump, but on the unfinished side, the water just trickles across the floor at will. Bummer. (This robin followed me around the yard every time I went out to plant something. He had quickly caught on that I was good for serving up his dinner.)
We were checking up on things on the finished side of the basement when we heard a "drip, drip, drip" coming from behind a big mirror hung on the wall behind the bar. (It is worth noting here that all of the finishes on the finished side of the basement, like much of the decor in the rest of the house when we bought it, date back thirty years. And we currently have all of our yet unpacked boxes and unused furniture jammed willy nilly into this space. So when picturing, please include lots of knotty pine paneling finished an obnoxious orangey shade, the dingiest green no-pile carpeting and popcorn ceiling. These elements then packed full of chaos.) So we grabbed the ladder and a screwdriver, down came the mirror, and lo and behold, there was a window. The entire rest of the house besides the basement has the original leaded glass steel casement windows. The basement windows were all (we thought) replaced with glass block at some point. But nope, there behind the mirror was an original, same as above grade complete with oil-rubbed bronze hardware, but with steel muntins instead of leading. Outside of the window was completely dark, but the "drip, drip, drip" we were hearing had a hollow ring to it, so we guessed the window well had been covered over versus filled in. Eventually I made time to dig things up and see exactly what was going on on the outside. And sure enough, there below a bunch of dirt, plastic sheeting and chicken wire (ugh) was the iron grate, same as covers all of the other window wells, and below that the unfilled roughly five foot deep well.
Needless to say, after being covered up for the last probably quarter century, the whole thing was (is) in pretty bad shape. The window frame is extremely corroded on the outside which has resulted in a lack of support for the casements, which has resulted in their becoming misaligned, This along with disintegrating glazing has resulted in several of the beautiful frosted/textured panes of glass cracking. :( This all also means that it's been leaking for who knows how long which has resulted in all of the trim on the inside rotting away. 
The plaster above and below is also cracked and crumbling and the paint is peeling off the plaster walls to either side of the window behind the paneling. I tested for lead and while I got a negative for the outermost layer (a rusty red color) the residue left on the plaster from the innermost layer (a bright yellow), not surprisingly, tested positive. 
I consulted with a lead abatement professional who advised that we could safely clean up what was exposed ourselves and that as long as the rest stayed contained behind the paneling, there was no immediate concern. Our goal is eventually to tear out the paneling and see what condition the plaster behind it is in. If it is in good enough shape, we'd like to deal with abating the rest of the peeling lead paint (if there's a lot, with professional help), make necessary repairs, and leave it exposed. If it's in too bad of shape, we'll still abate the lead and then decide whether to go over it with drywall, paneling again, or some combination of the two. 
It is quite the conundrum to me why anyone would ever think it a good idea to cover up what amounts to a gaping hole in a basement wall with the scantest of materials and then just go on and pretend like it never existed. I have a couple of theories. That despite their plausibility honestly make no sense. 1. This window is directly across from where the television was mounted, so the window was covered up with the mirror to eliminate glare on the screen, and so there wasn't weird light shining out from behind the mirror during the day, the well was covered over too (one palm to face). 2. There was wiring run to install outdoor lights at some point, including two spotlights tucked into the dirt on top of the window well. So, the well was covered up in order to be able to place these lights and then the window was covered on the inside, because you know, who wants to look out at a big black hole? (gah, second palm to face). Like I mentioned, the other four windows were replaced with glass block. I am confident this was not a case of running out of cash to finish the job. I'm also confident the window must have been in pretty bad shape when it was covered up (as the others probably were, hence their being replaced). Thus my theories as to why it was just buried.

 So the bright side is, we have an original basement window! We are facing the fact that in the next five years ALL of the windows in the house need to be restored. The steel is rotting away at the bottoms of the casements and frames. And the leading is loose and cracked in places. When we had the aforementioned heavy rains, there was actually rain trickling in through the leading in spots. So it's easy to imagine how the cold winter air will do the same. As far as maintenance, there's been some patching at the joints of the lead cames, some glazing compound stuffed into the rotting bits, and a little paint applied to the inside and a LOT of paint to the outside (a good few of the windows are painted shut). So these beauties are in need of some tlc. I am starting to research companies and am having fun guesstimating what the price of this undertaking will be. 
In the meantime we had the iron grate over the well repainted.  I need to find some flower pots to stuff the lights in. And we have yet to figure out how to try to temporarily seal up the window. I excavated the concrete edge of the well (using an archaeology aka masonry trowel for a nice straight back wall of the flower bed) and stacked up some brick that was buried  holding the plastic sheeting in place to keep the dirt from the bed from washing back. Hopefully next spring we'll be tearing out those massive shrubs and doing some reworking of the front bed including some regrading.

And that concludes this edition of architectural archaeology. Whew. Let me tell you, this restoring old houses stuff, it's not for the faint of heart. I mean I love it, the glimpses into the past, the planning and problem solving, the dreaming of how it could be. But it entails quite a bit of stress too, that's for sure. Part of what's currently getting to me is the sheer quantity of work to be done and that both time and money are limiting factors at the moment. We don't have the time to diy things at a meaningful pace right now nor the money to contract very much of it out. And little fires keep popping up and needing to be put out that eat into the time and money we do have. And prioritizing what to spend these precious resources on can also be tricky, like trying to line up a whole bunch of moving targets. When I look around I can't help but see "the vision" and not being able to just execute it  at present can really bum me out if I let it. I am trying to keep perspective and remember that all this actually amounts to a whole lot to be thankful for, but I'll admit I've not been doing a great job at it. But we've just come off a very nice weekend with a good measure of both r and r and getting some things done. And we have family coming back in town this week to mind the little while we start to untangle the basement chaos. So onward and upward! 

August 24, 2015

Architectural Archaeology

I spend a lot of time trying to figure out how things were in the past. That's my job when I'm working in my field (archaeology/architectural history) and I can't shut it off. Ever.
Likewise, I'm always thinking ahead, visualizing what I'd like to do with a space, be it a room or a garden bed. 
And sometimes all the time I spend standing, staring, spacing out pays off and I observe something meaningful. Sometimes it's that the light is just right and the knew bit of knowledge pops out where it was invisible before. Most of the time it comes by way of something I've seen time and again, just never given consideration too. This time I think it had to do with moisture content. 
I was working outside on Friday and I think it had rained Thursday night. I was taking a break near the front porch when a I noticed a little rust stain on the porch had a match a couple feet away. They are the two "L" shaped marks in the foreground and they mark the doorway.
As soon as I saw them, I saw the line extending away in both directions and then around on the side as well, just outside the posts.
Our porch was enclosed at one time.
The next question was whether or not this had been an original feature or something someone added later on. So I looked up, and saw the little overhang there extending out past the posts, and concluded that the soffit must have been constructed with that little overhang to accommodate the upper framing of the enclosure. So when it was built, the porch was most likely screened in. Side note: It makes me sad that at some point someone added these massive gutters that hide those sweet little corbels, though I do concede there is a lot of roof up there for the rain to hit.
This is our back porch sans that overhang and any indications on the floor that it was enclosed.
Starting in the 1930s and continuing into the 1960s the Works Progress Administration issued grants to municipalities to fund the photography of properties for tax assessment purposes. Back in Seattle, the Puget Sound Regional Archives held the collection for King County and many King County Assessor's property records, available here, contained the image(s). In Toledo, the Toledo-Lucas County Public Libraries holds the collection for Lucas County and they have digitized many, if not all images in their collection which are searchable by address here. Unfortunately our house is not to be found among those properties online, so I am really hoping that they are still in the process of making images available, and that I will be able to find a hard copy in the archive. And I hope that whenever our photograph was taken, the enclosure was still there as who knows when it came down. 
Because I can't stop wondering what that enclosure looked like exactly and how it would have impacted the overall look of the house. The living room takes up the entire front gable end of the house and the dining room the entire side gable with it's window (with the stained glass carnations above) facing out onto the porch. Though you can't see it in the photos, as you step onto the porch, the front door is there on the right, leading into a foyer that links the living and dining rooms. So surrounded by formal spaces, I would have to think the enclosure would have been designed to be in keeping. Nowadays front porches have fallen into disuse/nonexistance in our air-conditioned, non-face-to-face communication age. And screened porches are found at the back of homes in the private realm. But in thinking back in time, it makes perfect sense that here the front was screened in. Besides being larger than the back porch, the front porch faces east, while the back faces west, and I can attest that as the summer sun sets, it gets pretty hot and bright. The front porch would have been the relatively cooler place to be, so why not make it bug-free as well? (I might add reconstructing the enclosure sounds like a pretty good idea after some of the mosquito attacks endured this summer.) So there you would be sitting, sipping your Canadian whiskey, waiting for your friends or associates and hopefully not your enemies or the G-Men to call on any given summer evening. At least if you were one of the previous owners of our house. We just met a neighbor this past week who knew the next family to who live in the house, during the 1960s and 70s and she mentioned that the father (who was superintendent of the state mental hospital) was a man of few words who spent the majority of his time sitting on the front porch smoking his pipe or upstairs in the attic weaving on his loom. So maybe the pipe smoke kept the bugs at bay for him, or maybe it was still the screens. Hopefully the archives and oral histories will tell. :)    


July 14, 2015

Time Travel, Living Room Edition

So we are finally settling into our new house and figuring out the routine. It's starting to feel and function more and more like home and to even look kind of pretty in places. 
One of the main reasons I ever started blogging was because I wanted to share my home with the world. I love interior design and I love seeing images of what others have done with their spaces. And I've always wanted to be part of that community of diy decorators who put it out there to inspire others. But I have really only ever posted snippets here and there because I've never deemed a space "finished" enough for the world to see. Granted we have moved three times in five years which makes for a pretty tight timeline to come up with the finished product. 
But I've finally come to accept that there in lies the problem. It's not necessarily so much about the finished product as the fun along the way. Especially with this house. There are so many projects to do, so much furniture and everything  else to acquire. It's going to be a long time before even one room, let alone the whole house, is "done".
So starting here and now I'm getting over it and taking my blog in a new direction. There will be a lot more interior (and exterior) project and design posts. And because of the age of this house and all of the original surviving features and details it contains combined with its back story (that I have yet to tell here but will get to soon) and my experience in architectural history and historic preservation in the course of working in cultural resource management, we are going to be approaching every "permanent" renovation from a restoration stand point. So that means if it's original to the house and it can be saved, it will be. And if something needs to be replaced, we'll be researching appropriate materials and everything will be in keeping with the house's existing style. So Unknown Blackbird will be taking a bit of a this old house bent. 
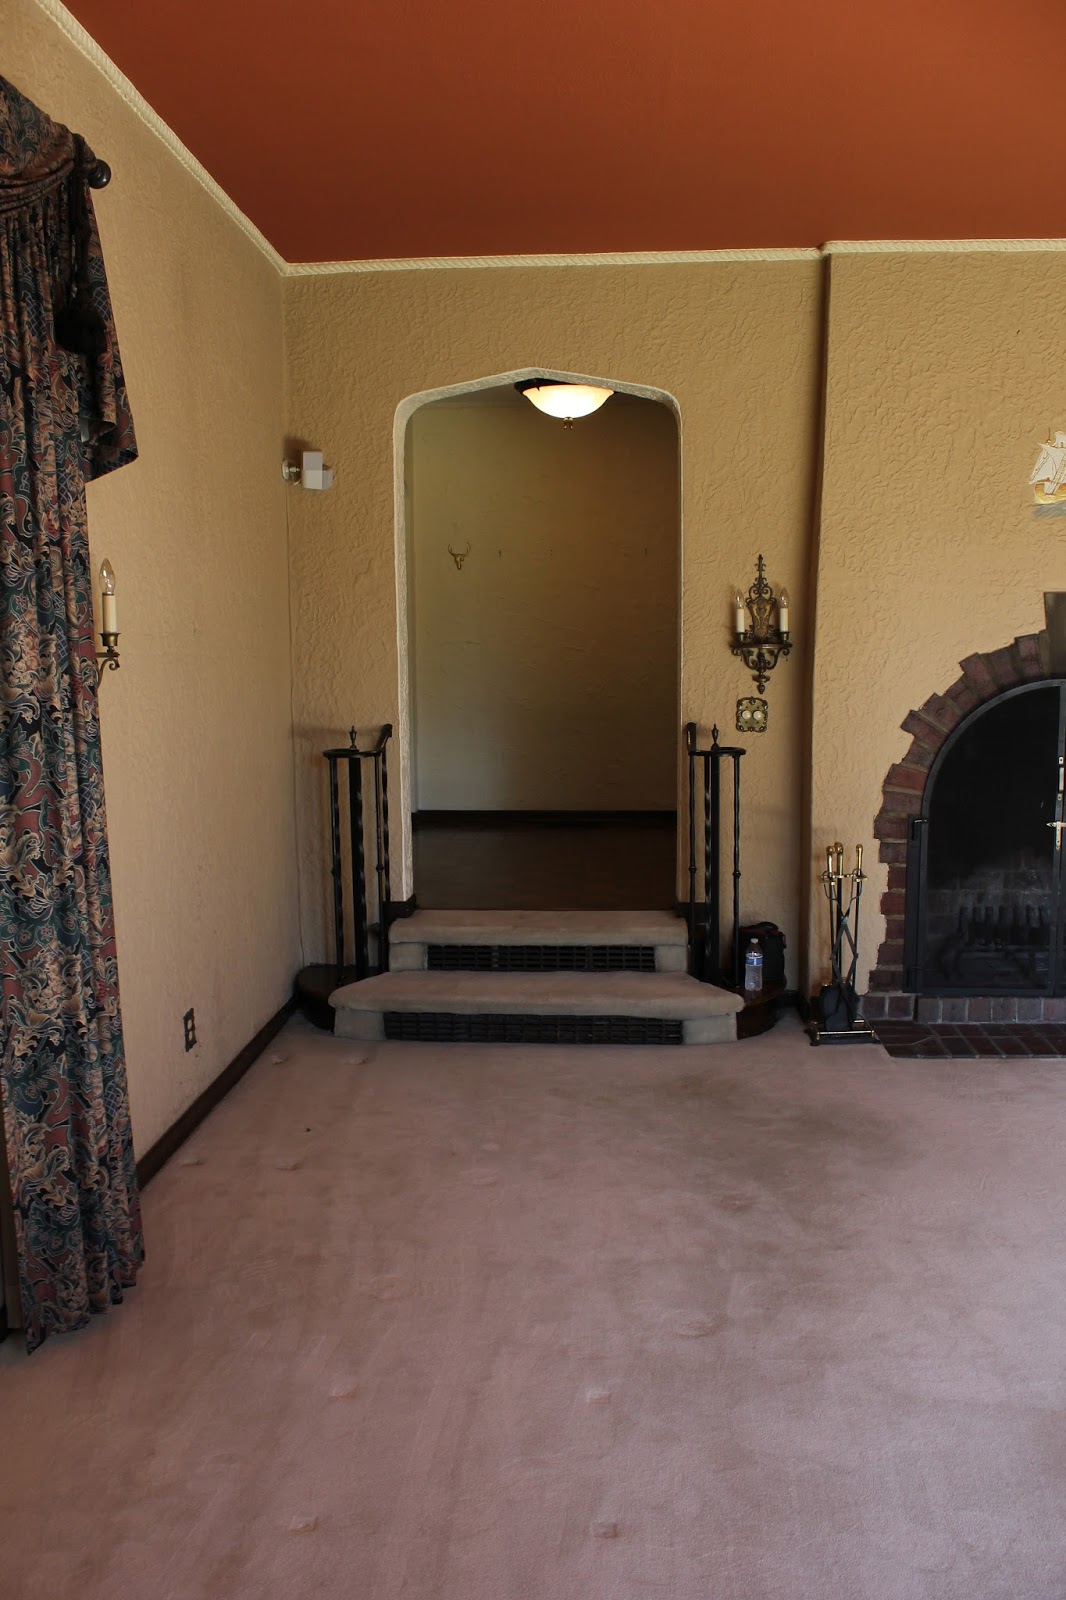
We joked when we bought the place that it might have very well been the set of a John Hughes movie. It was last decorated circa 1988 and the living room (dining room too) had the drapes to prove it. 

The first project we tackled, prior to moving in (because we made that mistake before) was to refinish the hardwood floors. Or rather have the hardwood floors refinished (because along with the mistake of living in the house while doing it, we also made the mistake of doing it ourselves. They turned out great, but upon wrapping it up 3 or 4 weeks after we started and only after my dad came to the rescue to help finally get it done, we had two words: NEVER AGAIN.) 
We thought for sure that a house built in 1923 would have to have hardwoods under all the carpets (parquet in the case of the foyer, hall and back entry). And upstairs sure enough there was one and a half inch oak strip everywhere. But on the first floor, much to our shock, the only thing we found was the tongue and groove, unfinished, pine subfloor. We finally deemed that the baseboard, though surprisingly short for the height of the ceilings, was original. It's the same throughout the house and in every room the texture on the walls (and we have some heavily textured walls) comes down on top of it with no sign it's ever been filled in after a taller base was removed. On the first floor it sat somewhere between an eight and a quarter inch off the subfloor and had holes from quarter round (shoe mold) being nailed to it previously. The height of the baseboard above the subfloor and the height the shoe mould sat at led us to the conclusion that the living and dining room and the foyer, hall and back entry had originally been carpeted, with something thinner than the modern stuff, more akin to a wall to wall oriental rug, to start with. Eventually this was swapped out for the more thickly padded wall to wall we all know and despise in the living and dining rooms and the quarter round removed. And the parquet was put in the high traffic zone.
I will admit that for going on somewhere around twenty years old, the carpet was not in that bad of shape, but the carpet was going on twenty years old. No matter what it might look like, ewwwww. We are not carpet people. Babies and pets and people who drink red wine and are clean freaks don't mix with carpet. So we decided to invest in hardwoods for the previously carpeted and parqueted areas of the first floor. Every house we looked at when we were house hunting was 50 plus years old and if there were original hardwoods, they were the almost invariably one and a half inch oak.  And as that was what was upstairs here as well, that's what we went with. In my experience, two inch seems to have been more common, so I am guessing the preponderance of one and a half in the greater Toledo area is due perhaps to regional availability. Maybe a local mill was cranking out the one and a half? Just a guess.
Before the new floors were installed we had the living room painted. I love to paint and if I do say so myself, I'm quite good at it, one thoroughly painted apartment and four houses later. But the size of the room, the ceiling height, the existing terra cotta color of the ceiling, the timeline of the floor project, the taking care of an infant, and our desire to just have this space done when it was time to move in, all combined to make it just make more sense to call in a pro. We used Sattler Painting and they did a very nice job. I am a Benjamin Moore devotee and that's what they use, so that helped solidify the choice. To make the darker floors and woodwork pop out and free me up to use color more liberally when it comes to furniture and accessories I've decided to make all the walls throughout the house Swiss Coffee. It's my favorite Benjamin Moore white. Totally neutral, no undertones, but still nice and warm.
We used Floorcraft Designs for the floors throughout and they did a fantastic job and were easy to work with too. 
So as it stands now, here's the living room. As I mentioned, we went with a darker stain for the floors (I am not sure of the brand and am forgetting the name of the color at the moment), something that falls in the middle of the various shades of the existing woodwork (all original, unpainted oak) throughout the house.


In thinking about how to make the floors on the first floor feel like they belonged, like they'd always been here, beyond just using the inch and a half strip, and in light of some of the high end design choices that were made when the house was built, I started to think maybe doing a little something special was called for. There was of course a budget for this project and there wasn't much extra for the something special. At first I had in mind some kind of border all the way around both the living and dining rooms and maybe a transition of some sort between the dining and foyer, but Michael of Floorcraft steered me towards picture framing the fireplace with the combination of walnut and two and a quarter inch (I believe it is) oak bands, and doing a matching area rug detail in the center of the dining room (I won't try to explain what that is exactly, will do a post on the dining room eventually). And it turned out to be just the thing. 
While we may still need more and bigger furniture, art, window treatments, (interesting that there is no trim around any of the windows in the house except the sill, they were always meant to be "dressed"), etc, etc, etc, I am pretty proud of how far we've come. So there it is, my first before and after!